

Workplace Recycling Made Simple: A Step-by-Step Setup Guide
Recycling at work doesn’t need to be complicated. In fact, with the right setup and a little planning, your workplace can significantly reduce waste, lower disposal costs, and show leadership in environmental responsibility.
Whether you're in a small office or a large commercial site, here’s how to set up an effective recycling system that works.
Step 1: Assess Your Waste
Start with a basic waste audit. Take a look at the types of waste your office produces — paper, plastics, food scraps, e-waste, packaging. Understanding what you're throwing out helps tailor your recycling bins and signage to your actual needs.
Step 2: Define Your Recycling Streams
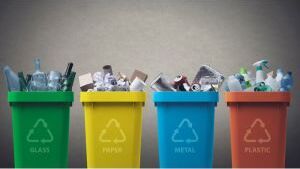
In New Zealand, common commercial recycling categories include:
-
Paper & cardboard
-
Plastics (1 & 2)
-
Cans & glass
-
Food waste (compostable)
-
E-waste
-
Soft plastics (where supported)
Make sure your bins and waste contractors align with these categories.
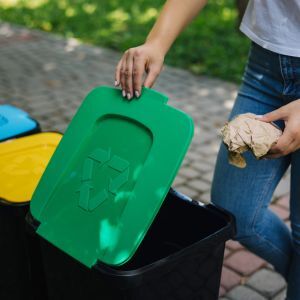
Step 3: Choose the Right Bins
Invest in clearly labelled, colour-coded commercial recycling bins. Look for durable options designed for indoor office use — ideally with separate compartments for each waste stream.
Pro Tip: Place bins in high-traffic areas like kitchens, meeting rooms, and break areas. People won’t recycle if bins aren’t convenient.
For a deeper dive into this topic, check out our article: Where Should You Put Recycling Bins in the Office for Maximum Use?. It explores bin placement strategies that improve recycling rates and reduce contamination, helping your workplace get the most out of its sustainability efforts.
Step 4: Use Clear Signage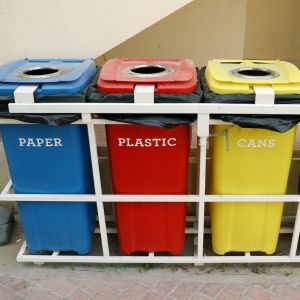
Good signage is just as important as the bin itself. Use simple, visual labels that show what can and cannot go into each bin. Use consistent colours to match NZ waste stream standards.
Pro Tip: Create clear signage that visually illustrates what goes in each bin. Use bold colours and imagery that matches your waste streams to avoid confusion and encourage correct recycling.
Step 5: Educate Your Team
Staff engagement is crucial. Send out a recycling policy email, host a short training or toolbox talk, and encourage questions. People are more likely to recycle correctly if they understand why it matters and how to do it.
Pro Tip: Consider appointing a “recycling champion” in each department to lead by example.
Step 6: Monitor and Improve
Set a reminder to check bin contamination and volume weekly. Are recyclables ending up in general waste? Are bins overflowing? Make small adjustments to signage or placement as needed.
Pro Tip: Use this data to report on progress and share wins with your team — it builds momentum and participation.
Bonus Tip: Make It Easy for Cleaners
Work with your cleaning team to ensure they know how each bin is used. Provide liners and trolleys that match your streams, and avoid asking them to sort contaminated waste.
Even with the best intentions, many New Zealand workplaces make common recycling bin mistakes that lead to contamination and wasted effort. From incorrect labelling to using the wrong liners, these slip-ups can undermine your sustainability efforts. To learn what to watch out for and how to fix it, read our article: Recycling Bin Mistakes NZ Workplaces Often Make – And How to Fix Them.
Conclusion
Setting up workplace recycling doesn’t have to be hard. With the right bins, clear communication, and team involvement, you can reduce your environmental impact and support a greener New Zealand.
Explore Insinc’s range of commercial recycling bins, signage and sustainable office supplies — ideal for offices, schools, and commercial environments across Aotearoa.
https://www.insinc.co.nz/category/recycle-bins.html
Posted: Thursday 30 October 2025
